How to Create Shadows with the Blend Tool (Adobe Illustrator)
- Sep 2, 2024
- 3 min read

Create realistic shadows in Illustrator - quick and easy
Have you ever struggled to create realistic shadows in your Illustrator designs? The Blend Tool offers a powerful and efficient solution. By blending two objects, you can create smooth gradients that perfectly mimic the effects of light and shadow. This technique is particularly useful for adding depth and dimension to your illustrations.
Create Realistic Shadows in Only Four Steps
Let's dive into a simple example to demonstrate how to use the Blend Tool for creating shadows:

Let me show how I created this shadow in only four easy steps!
Step 1: Create the Object
Create a shape: Start by drawing a shape (e.g., a circle) that will serve as the main object for your illustration. In my case, I created a top view of a glass filled with water and ice cubes that is standing on a coaster.

Step 2: Duplicate the Object's Shape
Copy the base shape (Cmd + C on macOS, Ctrl + C on Windows) of the created object and past in place (Cmd + B on macOS, Ctrl + B on Windows). Then copy this shape again and move it where the end of the shadow will be.
Change the color of both shapes to match your desired shadow color.
In my case, I duplicated the circle shape of the glass, copied it twice and adjusted the color to black.

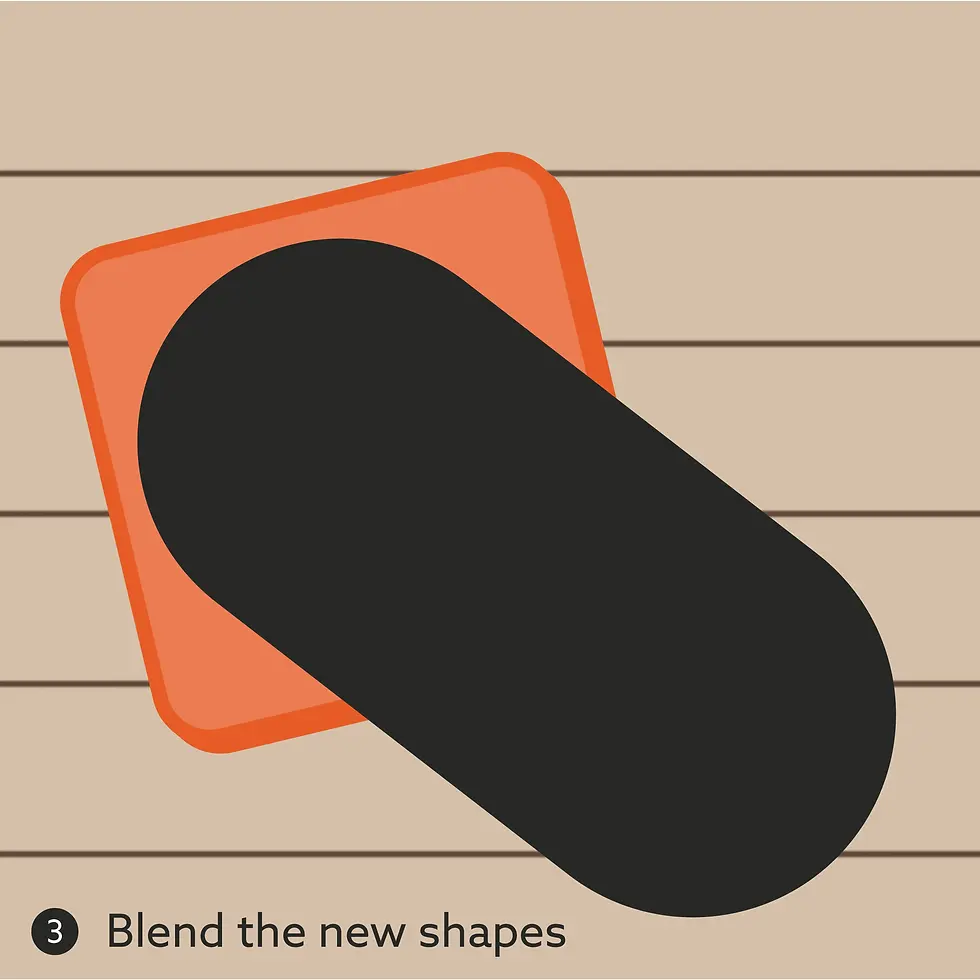
Step 3: Apply the Blend Tool
Apply the Blend Tool: Select both newly copied shapes and apply the blend tool in the Toolbar (Object > Blend > Make) or press Alt+Cmd+B on macOS, Ctrl+Alt+B on Windows.
Adjust blend options: Right-click on the blend and choose "Blend Options" to customize the number of steps, spacing, and other settings. Set a high number of steps to create a blend with smooth edges.
Step 4: Refine the Shadow
Adjust position: Place the blended shapes below the object.
Adjust color: If desired, change the color of the shadow to match the object's color or create a more dramatic effect. You can also experiment with the shadow's position and size to achieve your desired shadow effect.
Reduce opacity: Lower the opacity of the duplicated shape to create a transparent shadow effect. You can adjust the opacity of each shape individually, but also of the entire blend.
In my example, I adjusted the opacity of the shadow end to 0% and of the whole blend to 40%. I repeated the four steps for the shadow of the coaster.

The Blend Tool is a versatile tool that can significantly enhance your Illustrator designs. By following these steps and experimenting with different settings, you can create dynamic and realistic shadows that add depth and dimension to your illustrations.
Additional Applications of the Blend Tool
Beyond creating shadows, the Blend Tool can be used for a variety of other creative purposes. For example, you can:
Create gradients: Blend between two colors to create smooth gradients for backgrounds, text effects, or shapes.
Generate patterns: Blend between two shapes to create interesting patterns or textures.
Simulate textures: Blend between multiple shapes or colors to simulate textures like wood, stone, or fabric.
Animate objects: Use the Blend Tool in combination with animation techniques to create smooth transitions between shapes or colors.
So next time you're working on a project, don't hesitate to explore the possibilities of the Blend Tool.

Conclusion
The Blend Tool is a versatile tool that can significantly enhance your Illustrator designs. By following these steps and experimenting with different settings, you can create dynamic and realistic shadows that add depth and dimension to your illustrations. So next time you're working on a project, don't hesitate to explore the possibilities of the Blend Tool.

.png)


Comments